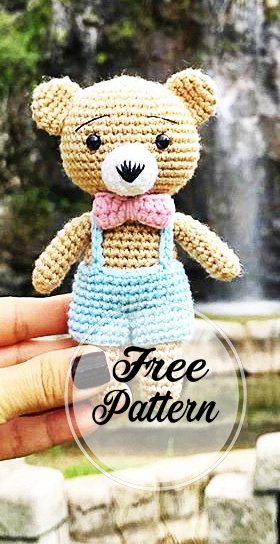
Hello friends, a few days ago I shared an amigurumi bunny pattern. Today I’m going to share a teddy bear pattern made using almost the same pattern. As you know, teddy bear amigurumi patterns are among the most admired and sought after patterns of all time. This is why these types of amigurumi patterns have been designed recently. The crochet bear pattern has some differences from the rabbit. First, of course, are the ears. In addition, an extra muzzle part has been added to the teddy bear. In this way, a teddy bear pattern was made making a big difference. I really like the teddy bear pattern. It goes without saying that the pattern is free.
You can also download the amigurumi pattern in pdf format. The amigurumi pattern is a very easy pattern for a beginner. But the only part that can challenge you is the teddy bear’s bow tie. After you have crocheted the last piece, your amigurumi will be ready. Now let’s crochet the teddy bear amigurumi step by step.
With easy knitting models, you can carry the knitting all around your life and color your life with knitting.
With Amigurumi knitting models you can also create small, cute pieces and give them to your loved ones.
Abbreviations:
R: round
mr = magic ring
sc = single crochet
inc = increase (2 sc in the next stitch)
dec = decrease (join the next 2 stitches into 1)
sl st = slip stitch
st = stitch
ch = chain
F.O = finish off
( ) = number of stitches you should have at the end of the round/row
( ) x 6 = repeat whatever is between the brackets the number of times stated
To crochet Teddy bear amigurumi you need:
Yarn: brown color, blue, white
2.5mm Crochet hook
One ribbon bow
Fiberfill for stuffing
Sewing needle and scissors
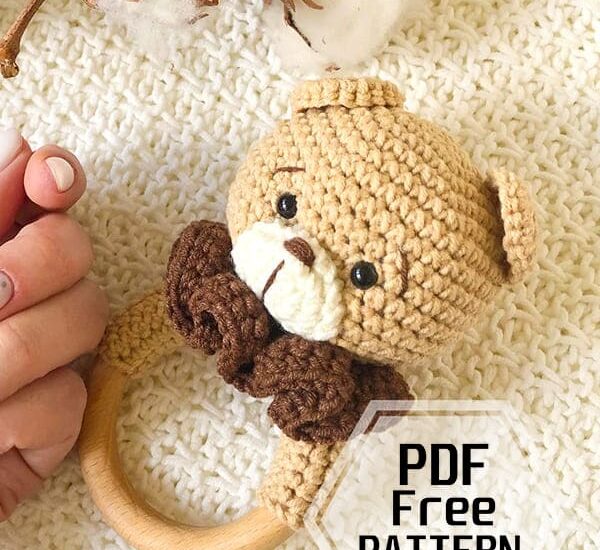
Small teddy bear keychain amigurumi
Free crochet patterns

Head
Start with brown color yarn
R 1: mr with 6 st (6)
R 2: inc x 6 (12)
R 3: (1 sc, inc) x 6 (18)
R 4: (2 sc, inc) x 6 (24)
R 5: (3 sc, inc) x 6 (30)
R 6: (4 sc, inc) x 6 (36)
R 7: (5 sc, inc) x 6 (42)
R 8-13: 42 sc (42)
R 14: (5 sc, dec) x 6 36)
R 15: (4 sc, dec) x 6 (30)
R 16: (3 sc, dec) x 6 (24)
R 17: (2 sc, dec) x 6 (18)
R 18: (1 sc, dec) x 6 (12)
Sl st. Stuff with fiberfill.
Cut the yarn, leaving a long tail for sewing
Note: Insert safety eyes (or normal eyes) between round 9 and round 10 at the distance of 7 stitches in between the eyes.
Ears (make 2)
Start with brown color
R 1: mr with 6 st (6)
R 2: inc x 6 (12)
R 3: (5 sc, 1 inc) x 2 (14)
R 4: 14 sc (14)
R 5: (5 sc, 1 dec) x 2 (12)
Sl st. Cut the yarn, leaving a long tail for sewing.
Muzzle
Start with white color
R 1: mr with 6 st (6)
R 2: inc x 6 (12)
R 3: (5 sc, 1 inc) x 2 (14)
R 4: 14 sc (14)
Sl St. Cut the yarn, leaving a long tail for sewing.
Note: When sewing, we put a small amount of fiber into it.
Arms (make 2)
Start with brown color yarn
R 1: mr with 6 st (6)
R 2: (2 sc, inc) x 2 (8)
R 3-10: 8 sc (8)
Legs (make 2)
Start with brown color yarn
Leg 1
R 1: mr with 5 st (5)
R 2: inc x 5 (10)
R 3-11: 10 (10)
Leg 2
Make the other leg, don’t cut the yarn. Continue to crochet 2 ch and join leg 1 with sl st.
Continue to crochet the body using the stitches of both legs.
Body
R1: 10 sc (leg 1), 2 sc (2 stitch of chain), 10 sc (leg 2), 2 sc (2 stitch in other side of chain). (24)
R 2-8 : 24 sc (24)
R 9: (dec, 10 sc) x 2 (22)
R 10: (dec, 9 sc) x 2 (20)
R 11: (dec, 8 sc) x 2 (18)
R 12: (dec, 7 sc) x 2 (16)
R 13: (dec, 6 sc) x 2 (14)
R 14: (dec, 5 sc) x 2 (12)
R 15-16: (12)
Little Teddy Bear
Overalls
Trouser leg (make 2)
Make 20 ch, sl sl into the first chain make a circle and continue crochet.
R 1-3: 20 sc (20)
Make the second trouser leg, don’t cut the yarn. Sew two stitch from the 2 legs together.
Continue to crochet the pants using the stitches of both legs.
R 5-7: 36 sc (36)
R 8: (15 sc, dec) x 2 (34)
Make enough chains for straps of overalls. Make sc on the chains. Sl St. Cut the yarn, leaving a long tail for sewing.Straps (make 2)
Assembly:
– Sew the muzzle to the head. Embroider a nose and brows (like picture). The muzzle should be centered between the eyes.
– Sew ears to the head.
– Sew the head to the body
Pattern by: @ulfetdemir
Picture: @Byshebo & @ulfetdemir
Translate by: Amigurumiforum.com