


Diglett is a Pokemon and you can easily learn that this Pokemon is a mole. Frankly, I thought this animal was a worm. However, after doing some research, I learned that it was a mole. Amigurumi toys do not have to look exactly like the animal you crochet. In fact, you may notice that many amigurumi animal toys have very similar features to cartoon characters.
Diglett the Plush Mole Crochet Pattern Step by Step
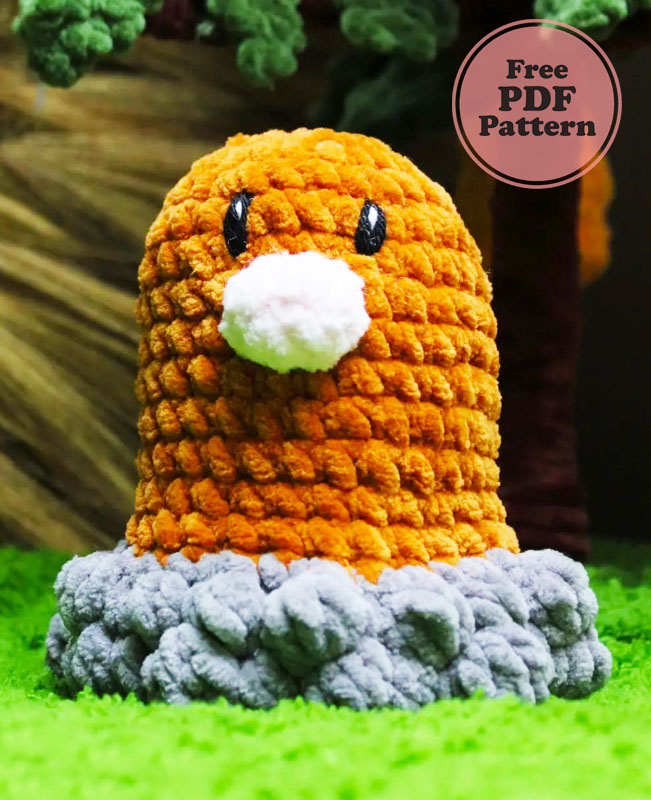
The crochet toy consists of 2 pieces. This will make your work much easier. We see that the lower part of the toy is made of gray yarn and the upper part is made of brown yarn. We will need to use the bobble stitch technique, especially in the gray part of the toy. If you are a beginner, this toy will be useful for learning new things.
There is no information about the yarn brand you will use when making the toy, but it is clearly seen that you should use chenille yarn. Finally, you can start crocheting the toy by choosing a crochet hook suitable for your yarn size. If you are ready, let’s make the crochet mole together step by step.
Designer: craftedforcomfort
Materials
• Yarn in brown, grey and pale pink
• Yarn for eye embroidery in white and black OR safety eyes
• Crochet hook, scissors, stitch marker, stuffing, & yarn needle
Abbreviations – US Terminology
Ch= Chain
Mr = Magic ring
Sc = Single crochet
Dec = Single crochet decrease
Inc = Single crochet increase
Bbl = 5 incomplete double crochet and pull yarn through all 6 loops on the hook
Trbbl = 5 incomplete triple crochet and pull yarn through all 6 loops on the hook
Minibbl = 3 incomplete double crochet and pull yarn through all 4 loops on hook
() = Includes the stitch count for the row
FLO/BLO [] = Front/Back loop only for all stitches within [ ]
Body & Base
Begin with brown yarn.
R1. Mr8 (8)
R2. 8inc (16)
R3. (2sc, inc) repeat 5 times, inc (22)
R4. (3sc, inc) repeat 5 times, 2sc (27)
R5-13. Sc around – 9 rounds (27)`
You can make your Diglett taller by adding rounds

Change colour to grey.
R14. FLO [(sc, inc)x13, sc] (40)
R15. (inc, minibbl, 2sc, bbl, sc, inc, minibbl) repeat 5 times (50)
R16. (inc, trbbl, inc, sc, minibbl, inc, bbl, sc, minibbl, sc) repeat 5 times (65)
R17. BLO [32dec, sc] (33)
R18. 16dec, sc (17)
Push your bbls to be on the right side if needed

If you are using safety eyes, insert them between rounds 5 and 6 around 2-3 visible sc apart.
Stuff the body firmly and lightly stuff the grey base. Continue to stuff until you close up but be careful to not overstuff, the base should be completely flat.
R19. (sc, dec) repeat 5 times, 2sc (12)
R20. 4dec – leave the round unfinished with 8sc around.
Fasten off and close up the hole.

Nose
O Crafted For Comfort
R1. Ch3, starting in the 2nd chain from the hook: sc, [3sc in one stitch], on the other side of the chain: sc, [3sc in one stitch] (8)
R2. Sc around (8)
Fasten off with a slip stitch. Do not stuff. Pinch the nose to be more oval shaped rather than round and sew to the body over rounds 6-8.

Embroidered eyes (optional)
With black yarn (I use cotton), make several stitches over rounds 5 and 6. Repeat until the stitches make an oval shape. With white yarn, make 1-2 stitches from the top of the eye to the middle of the eye. I made my eyes 3/4 visible stitches apart in line with the nose as pictured below. There are detailed eye tutorials on Youtube and you can also use felt for this.

You have finihed your little mole.


